Motors
The RedBot is a two-wheeled robot. It also has a semi-circular plastic "nub caster" on the underside of its chassis at the back. This caster acts as a third point of contact to balance the robot (similar to a third wheel, except the caster doesn't rotate).
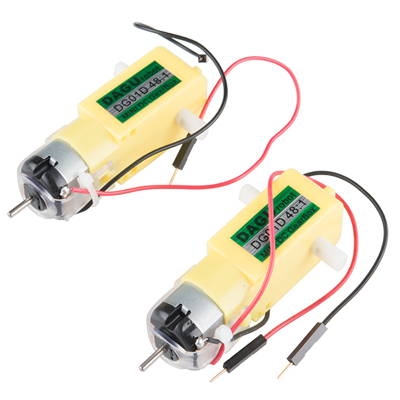
Each wheel is driven by its own motor, which is connected to the RedBot circuit board by a pair of red and black wires. These left and right motors can be controlled as a set or independently, in order to make the robot drive forward, backwards, or make turns.
You can also determine how much power each motor receives, in order to rotate the wheels faster or slower, to control the speed of your robot as it drives and turns.

The RedBot has a wheel encoder located directly behind each motor. The wheel encoders count the number of times each motor has rotated. This information can be used to calculate the distance that the robot has driven or turned.
Together, the motors and wheel encoders can perform several useful robot behaviors:
The robot can drive in a straight line by making small adjustments in the left and right motor powers to make sure both motors rotate at the same average speed.
The robot can drive for a specific distance by calculating how far the wheels have traveled. This is combined with adjusting the motor powers to drive straight.
The robot can pivot on both wheels by a specific angle by calculating how far the wheels have traveled while pivoting in a circle.
The robot can turn on one wheel by a specific angle by calculating how far the driving wheel has traveled while turning in a circle.
How to Code Motors
To use the motors in your robot app, you will need to:
Create
RedBotMotorsobject for the motorsUse the object's methods to control the motors:
drive(),brake(),pivot(), etc.
Create RedBotMotors Object
The SparkFun RedBot library has a class named RedBotMotors which defines methods (functions) to control the left and right motors.
Before the setup() function, create a RedBotMotors object by assigning it to a variable name:
REDBOT LIBRARY: Be sure your robot app has an #include statement for the SparkFun RedBot library. Here's how to include the RedBot library.
Driving
The RedBotMotors object has several methods for driving the robot's motors forward (or in reverse). Both motors can be driven together, or each motor can be driven separately:
drive()— drives both motorsleftDrive()orleftMotor()— drives the left motor onlyrightDrive()orrightMotor()– drives the right motor only
Each of these methods requires a motor power to be listed within its parentheses. The motor power can be can be any integer value (whole number) between -255 and 255:
Positive values drive the robot forward.
Negative values drive the robot in reverse.
A larger absolute value produces a faster driving speed (i.e.,
255is the fastest speed for driving forward,-255is the fastest speed for driving in reverse, etc.).
ONE EXCEPTION TO RULE: The leftMotor() method works differently. Positive values rotate the left motor clockwise, which is actually in reverse. Negative values rotate the left motor counterclockwise, which is forward.
For example, to drive both motors forward at a power (speed) of 150:
For example, to drive both motors in reverse at a power (speed) of 100:
For example, to drive just the left motor forward at a power (speed) of 125:
KEEP ON DRIVING
Once a code statement is used to start driving one or both motors, the motor(s) will keep driving continuously until a separate code statement is used to stop the motor(s). This is similar to how separate code statements are needed to turn an LED light on and then off.
The delay() method can be used to allow the motor(s) to drive for a certain amount of time before stopping the motor(s).
For example, this code will drive the robot forward at a motor power of 150 for 3 seconds and then stop the motors:
NOT TOO FAST – AND NOT TOO SLOW
If you run the motors at a very high power, the wheels might "spin out" due to insufficient traction with the surface. If you notice this issue, use a lower motor power. In general, use a motor power of 200 or less, depending on the surface.
If you run the motors at a very low power, they might not have enough torque to actually rotate the wheels. If you notice this issue, use a higher motor power. In general, use a motor power of 50 or more, depending on the surface.
DRIFTING WHILE DRIVING
When driving both motors, you may notice your robot drifts slightly to the left (or right), instead of driving in a perfectly straight line. This is actually a common occurrence with independent wheel drive vehicles. This happens because the motors are rotating at slightly different speeds, even though they may be receiving the same amount of power.
If necessary, there are custom functions that use the wheel encoders to adjust the left and right motor powers while the robot is driving, in order to make it drive in a straight line.
Stopping
The RedBotMotors object has several methods for stopping the robot's motors. Both motors can be stopped together, or each motor can be stopped separately:
brake()— abruptly stops both motors (quick braking)coast()orstop()— stops both motors (coast to a stop)leftBrake()— abruptly stops the left motor onlyrightBrake()— abruptly stops the right motor onlyleftCoast()orleftStop()– stops the left motor onlyrightCoast()orrightStop()– stops the left motor only
For example, to brake both the motors:
For example, to stop just the left motor:
Turning
There are three ways to turn the robot, depending on how tight the turn needs to be:
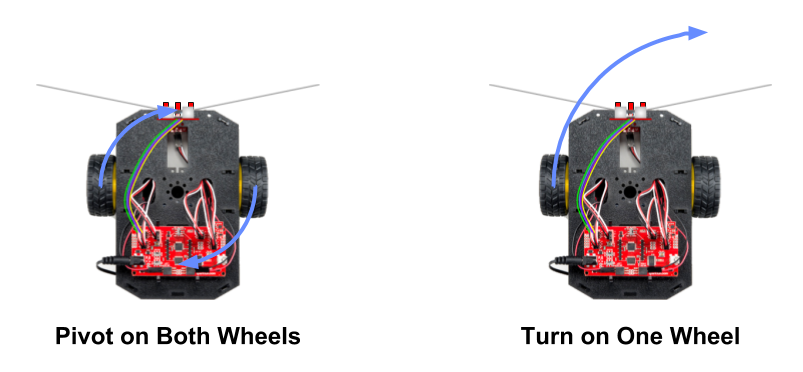
Pivot on Both Wheels – both motors drive at same power, but in opposite directions
Turn on One Wheel – one motor drives, while other motor is stopped
Drive in Curved Path – both motors drive in same direction, but at different powers
Pivot on Both Wheels
The RedBotMotors object has a pivot() method which drives one motor forward, while driving the other motor in reverse. This makes the robot pivot either clockwise (to the right) or counter-clockwise (to the left).
Pivoting results in a perfectly tight turn ("zero turn radius") as the robot's axis of rotation is centered between its wheels.
The pivot() method requires a motor power to be listed within its parentheses. The motor power can be can be any integer value (whole number) between -255 and 255:
Positive values pivot the robot clockwise to the right.
Negative values pivot the robot counter-clockwise to the left.
A larger absolute value produces a faster pivot speed (i.e.,
255is the fastest clockwise speed,-255is the fastest counter-clockwise speed, etc.).
PIVOT SLOWLY: Pivot the robot at a lower motor power to avoid wheel slippage. In general, try using a power of 100 for pivoting, depending on the surface.
For example, to pivot the robot clockwise to the right at a power (speed) of 100:
For example, to pivot the robot counter-clockwise to the left at a power (speed) of 100:
KEEP ON PIVOTING
Once a code statement is used to start pivoting the motors, the motors will keep pivoting continuously until a separate code statement is used to stop the motors. This is similar to how separate code statements are needed to turn an LED light on and then off.
The delay() method can be used to allow the motors to pivot for a certain amount of time before stopping the motors.
For example, this code will pivot the robot clockwise to the right at a motor power of 100 for 0.75 seconds and then stop:
Turn on One Wheel
Alternatively, you can turn the robot on one wheel by driving one motor while stopping the other motor. The robot will turn in a circle centered on the stopped wheel.
Turning on one wheel produces a less tight turn compared to pivoting on both wheels:

For example, to turn clockwise on the right wheel:
For example, to turn counter-clockwise on the left wheel:
KEEP ON TURNING
Once a code statement is used to start driving one motor to turn the robot, the motor will keep driving continuously until a separate code statement is used to stop the motor. This is similar to how separate code statements are needed to turn an LED light on and then off.
The delay() method can be used to allow the motor to drive for a certain amount of time before stopping the motor.
For example, this code will turn the robot clockwise on the right wheel at a motor power of 100 for 1.5 seconds and then stop:
Drive in Curved Path
Finally, you can also drive the robot in a curved path by driving both motors in the same direction (both forward or both in reverse) but at different motor powers:
Applying more power to the left motor will cause the robot to curve to the right.
Applying more power to the right motor will cause the robot to curve to the left.
A larger difference in the motor powers will make the robot drive in a sharper curve (while a smaller difference will make the robot drive in more gentle curve).
For example, this code will make the robot drive in a curved path to the left:
For example, this code will make the robot drive in a curved path to the right:
For example, this code will make the robot drive in a sharper curved path to the right:
KEEP ON CURVING
Once code statements are used to start driving the motors in a curve, the motors will keep driving continuously until a separate code statement is used to stop the motors. This is similar to how separate code statements are needed to turn an LED light on and then off.
The delay() method can be used to allow the motors to drive for a certain amount of time before stopping the motors.
For example, this code will make the robot drive in a curved path to the left for 3 seconds and then stop: