D. Detect Objects in Path
In this fourth tutorial, you'll learn how to make your robot detect objects in its path by using its mechanical bumpers and (if equipped) ultrasonic sensor.
Tutorial Goals
The goals of this tutorial are to help you:
Program a robot app that uses the mechanical bumpers to detect collisions with objects
Program a robot app that uses the ultrasonic sensor to avoid collisions with objects
How Mechanical Bumpers Work
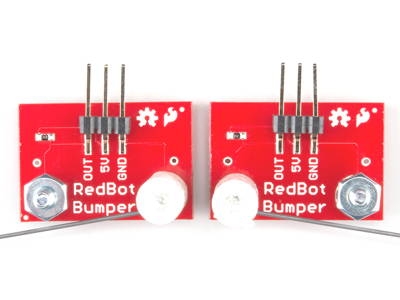
The RedBot has left and right mechanical bumpers with "whiskers" to detect collisions with obstacles. Each "whisker" is a flexible metal wire that will bend during a collision. If the wire bends far enough, it will make electrical contact with a metal screw on the bumper board. It is similar to how a switch or button works.

Check Positions of Whiskers and Bumpers
In order for the bumpers to detect collisions accurately, you need to check the positions of the wire whiskers and the bumper boards. Otherwise, it simply may not be physically possible for the wire whiskers to make contact with the metal screw on the bumper boards.
Wire Whiskers
In the normal position (no collision), each wire whisker should be positioned very close to the metal screw on its bumper board. There should only be about ⅛ inch between the wire and the screw. Otherwise, if the wire is too far away, it may not be physically possible for an obstacle to bend the wire far enough to make contact with the screw.
To adjust the position of a wire whisker, you have to loosen the plastic standoff screw on the bottom of the bumper board. In order to physically access this screw on an assembled robot, you may have to remove the entire bumper (by removing the top screw of the plastic standoff, which attaches the bumper to the robot's front end). You also might need to unplug the 3-wire cable that connects to the bumper. After adjusting the wire whisker, correctly reconnect the 3-wire cable, and then reattach the bumper to the robot's front end.
Bumper Boards
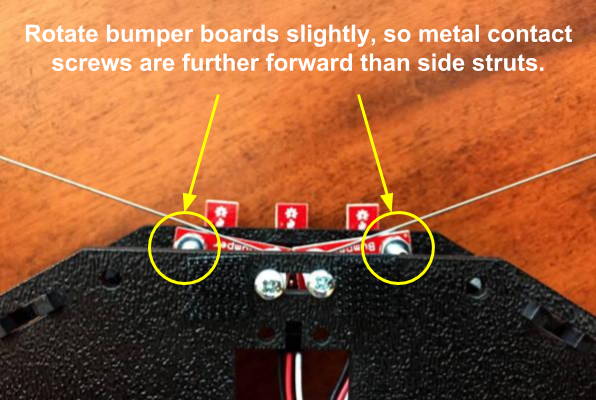
Each bumper board should be rotated slightly so the metal screw on the bumper board is positioned slightly in front of the black plastic struts at the front corners of the RedBot chassis. Otherwise, it may not be physically possible for the wire whisker to make contact with the metal screw.
The picture below shows the mechanical bumpers in the correct position. When looking down on the front of the robot, the metal screw of each bumper board (where the wire whisker will make contact) is visible. If you cannot see these metal screws, your bumpers might not be able to work.
To adjust the position of a bumper board, you have to loosen the the top screw of the plastic standoff, which attaches the bumper to the robot's front end. Rotate the bumper board slightly, so the metal screw is further forward than the side strut. Then tighten the top screw of the plastic standoff to secure the bumper.
