A. Meet Your Robot
In this first tutorial, you'll become familiar with your team's robotics kit. Your team might receive a new robotics kit that needs to be assembled – or you might receive an existing robot that is ready to use.
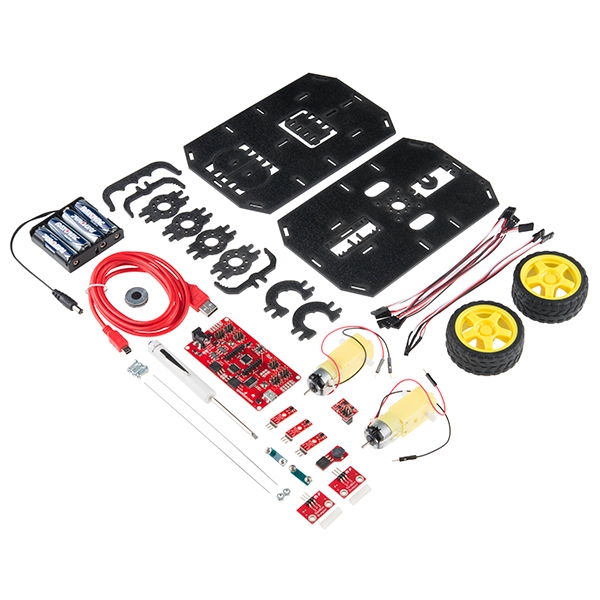
NEW ROBOT: If you need to assemble a new SparkFun RedBot kit, follow the instructions in the SparkFun Assembly Guide for RedBot. If your teacher added an ultrasonic sensor to your kit, follow these instructions to connect the ultrasonic sensor to your assembled robot.
IMPORTANT: Once a SparkFun RedBot has been assembled, it should remain assembled (even after the project is completed). RedBot assembly is a one-time process.
Tutorial Goals
The goals of this tutorial are to help you:
Understand the parts of your robot and their purposes
Identify the physical inputs and outputs that your robot can use to sense and act
RedBot Kit
This guidebook is tailored for a two-wheeled robotics kit called the SparkFun Inventor's Kit for RedBot, which will simply be referred to as the RedBot kit.
SparkFun is a company that sells products to help people build and program electronics devices. SparkFun created its RedBot kit by incorporating an Arduino-based microcontroller into an easy-to-use circuit board and packaged it with a set of motors, wheels, sensors, and other parts to help you learn how to program a wheeled robot. It is also possible to purchase additional parts (sensors, servo motors, etc.) that can be used with this RedBot kit.

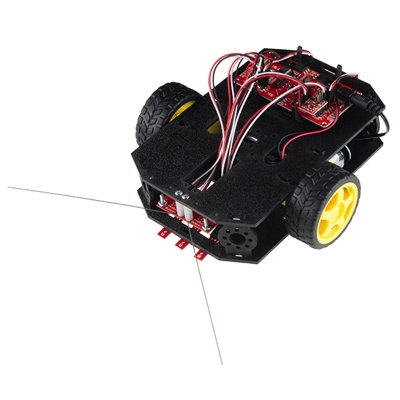
Once assembled, your RedBot should look like this:

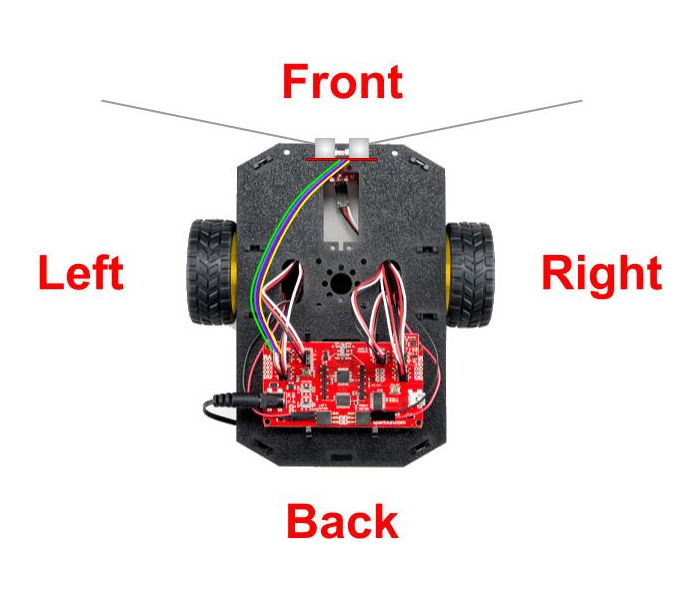
A simple (but important) step is to understand the orientation of the RedBot — specifically, which end is the front of the robot? An easy way to remember: most of the sensors are attached at the front end, while the circuit board is located at the back end.

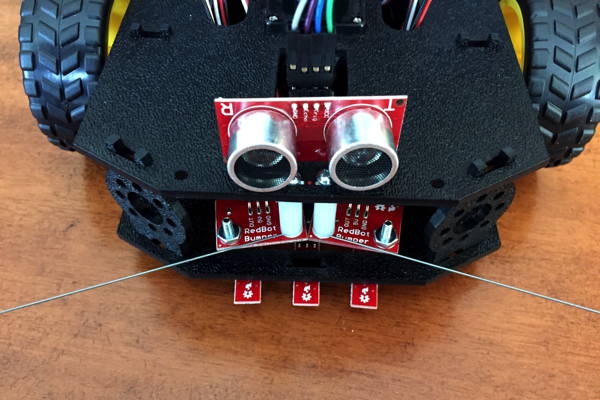
If you have an ultrasonic sensor, it should be mounted at the front of the robot on top of the chassis (above the mechanical bumpers and IR line sensors). The ultrasonic sensor should face forward, like a pair of "eyes" (though an ultrasonic sensor actually uses high-frequency sound waves to "see").
