Code: Chatbot
  • Chatbot Code Reference
  • Getting Started
  • Warm-up Project
    • 1 Code Template
    • 2 Read and Discuss
    • 3 Get Familiar with Rivescript
    • 4 Design a Bot with a Purpose
    • 5 Chatbot Evaluation
    • 6 Chatbot Improvement and Reflection
  • Code Mods
    • Add Sound Effects
    • Add Buttons for User Input
    • Using Functions
    • Connecting a Database Using Google Sheets
    • Searching a Database
    • Storing Data for a User
    • Placing JS Functions in your Main JS File
    • Using Topics
    • Create Flipcards
  • Rivescript Reference
  • Chatbot Project Guidebook
Powered by GitBook
On this page
  1. Code Mods

Add Buttons for User Input

PreviousAdd Sound EffectsNextUsing Functions

While a text interface is great for allowing people to engage with natural language, there are times when a simple button has advantages allowing you to interact with specificity and save time for the user.

Use HTML Buttons Directly in the Rivescript

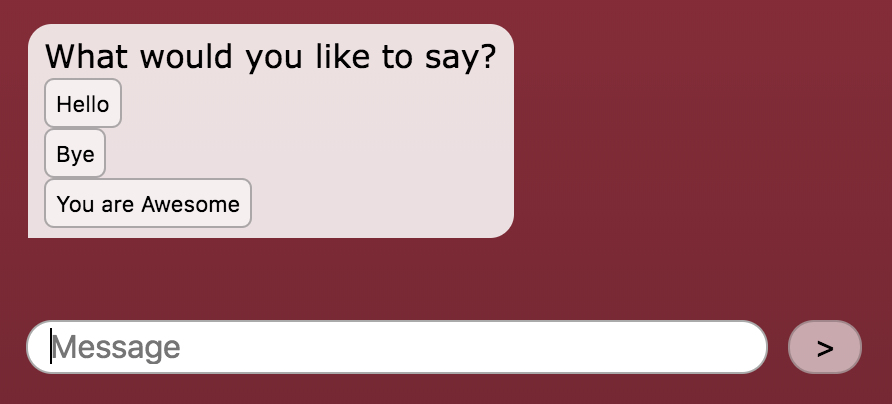
Below is an example of how you could insert buttons in the chatbot's response. It uses a standard HTML button element with an onclick attribute to run the `getReply() function of the chatbot library. Notice how each argument in the getReply functions ('hello', 'bye', or 'youre awesome') is a string that will match a trigger in your Rivescript file.

Notice that the example below uses the continuation syntax (^) in the chatbot response to make the Rivescript easier to read. Also notice that the optional <br> element is used to create a line break in the chatbot interface.

Rivescript
+ start
- What would you like to say?<br> 
^ <button onclick="chatbot.getReply('hello')">Hello</button><br>
^ <button onclick="chatbot.getReply('bye')">Bye</button><br>
^ <button onclick="chatbot.getReply('youre awesome')">You are Awesome</button>

+ hello
- Hi.

+ bye
- Bye. Come back soon.

+ youre awesome
- Thanks. You are even more awesome.

That's it. Modify as needed.